Laura discovered she had food allergies around the same time last year. It’s not the kind of allergy that can be treated with an enzyme tablet or by avoiding cheese. It’s the kind that requires you to eliminate half of your diet. We were all devastated by it. The allergies caused a lot of problems because we ate together every day. After regaining our spirits, we decided to try new recipes and improve on them together. We opted for gluten-free ones since that was the primary culprit in her diet.
Laura’s family always made homemade pizza for Sunday dinners. She loved the tradition but was disappointed when she couldn’t join in. We both tried to find gluten-free alternatives, but the results were always bland, doughy, and bean-flavored. Laura then had the brilliant idea of trying her mom’s classic crust recipe. She substituted a gluten-free flour blend for all purposes in order to make it allergen-free.
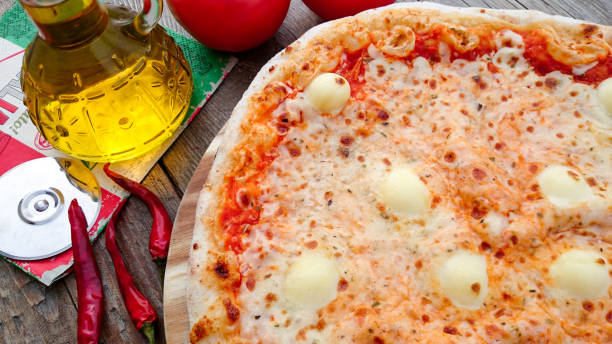
It was the best gluten-free pizza crust I have ever eaten. She prefers this to the restaurant versions, and I almost prefer it to GLUTEN versions in regular pizzerias. This is so good. This recipe is a must-try for anyone who eats gluten-free.
Laura agreed to let me photograph her preparing the recipe. John and I went to her house with her husband, Ben, on a weeknight. We shared a few bottles of wine and made pizza while I took pictures. We laughed and made jokes, of course. We always do. These guys are the best. The husbands were watching as their wives worked.
The boys requested pepperoni as our main topping. Daiya shreds were used on the girls’ pizza to make it dairy-free. Laura and I avoid dairy as much as possible. It was incredibly delicious. Seriously, this pizza is awesome. This pizza is delicious. It’s that good. I want to have it again right now, just by looking at it.
What’s the best part? The best part? What is the result? The result? A crust that gets crispy on the outside and remains a bit tender on the interior. The bread is delicate, as are most gluten-free breads. However, it’s not impossible to master. Laura has made it many times and is getting better at it. She can tell if something is wrong without the recipe or even looking at it.
Shauna Niquist explains in her book ” Wine and Bread ” that you should try a recipe only once and then follow it exactly. Then do it again and add your twists. You can also try it by memory. Enjoy.
Troubleshooting tips & FAQs
Is the crust too crumbly or dried?
Use the gluten-free blend we suggest in the notes. As we haven’t tested other combinations of Gluten-Free Flour, we can’t guarantee the results. Check the comments section for tips on store brands.
Is the crust too hard?
Next time, cook it less and roll it a little thicker.
How do you freeze pizza crust?
Bake the crust for 20-30 minutes. Let it cool, and then transfer to a container with a lid. Store in the freezer for up to one month.
Ingredients
- Dry active yeast, 1 tbsp
- 1 1/4 cups warm water ( divided).
- 2 Tbsp of sugar ( divided).
- *See notes for 3 cups of gluten-free blend flour
- 1 tsp of salt
- Baking powder, 1/2 tsp
- 1 Tbsp olive oil
Instructions
- Preheat oven to 350 degrees F.
- Combine yeast with 3/4 cup (180ml) of warm water (about 110 degrees F / 43 C) in a small bowl. If the water is too hot, it will kill yeast. Set aside for 5 minutes. Sprinkle 1 Tbsp of sugar (12 g) a few moments in.
- In a separate mixing bowl, combine the gluten-free flour mix, salt, baking soda, and the remaining sugar (1-2 Tbsp, 12-25 g), depending on your preferred sweetness. Mix until well combined.
- Add the yeast mixture to the dry mix. Before stirring, add the olive oil as well as an additional 1/2 cup of warm water (120 ml). Stir everything together using a wooden spatula (see photo).
- Spread the dough on a baking sheet or pizza stone that has been generously oiled if you are using all of it to make a large pizza. If you want to make a smaller pizza, reserve the remaining dough in the refrigerator for several days and wrap it up. If the dough becomes too sticky, use your hands to push it outwards and spread/flatten it (see photos). It should be very thin, less than 1/4 in.
- Pre-bake the pizza for approximately 20-25 minutes or until the crust looks dry. It’s perfectly normal for cracks to appear.
- Spread your pizza sauce of choice, along with cheese and toppings. Daiya was used to make ours dairy-free. Then, pop it back into the oven for 15-25 more minutes (depending upon the toppings) or until the crust looks golden brown.
- Serve immediately. The next day, it can be reheated in the microwave or oven.